Hello

Thank you for looking at my blog. My latest passion is applique which I have been doing since 2015. I love making things and learning new crafts On this blog you will see some of the things I have been working on. You will also see wonderful items created by other people. When I am not crafting I enjoy being with family and friends, singing and family history. My favourite place in the whole world is anywhere by the sea and I have to get my fix every few weeks. My favourite colour is PURPLE but I love turquoise too!


Sunday, December 29, 2019

Waterville throw

I finished Dave's present and it is now keeping them warm. I posted the colours a few months ago. It is 10 squares long by 8 squares wide and there are 5 colours in each random granny square. I used the join as you go method to connect the squares and used the colour Storm. I finished with five different colours around the edge and did a V stitch edge in Storm as the 6th. I only used 3 balls of the Storm in the end and there will be enough of the other colours left to make a poncho for my great neice.
 
 Back now to my Dune throw.


Tuesday, December 17, 2019

Gin School

Katie, my sister and I have been back to school. We have been making gin. We had fun mixing our own botanicals and then got to add them to alchol made from whey. We had our very own still and watched it drip through. Mine was 77% proof so had to be watered down to make it legal. It was then just a case of bottling it and leaving it for a week before we drank it.
 
This was one of my best experiences of the year, having fun with my best loved people. We each used a different recipe and I have now tasted them all, delicious. Mine is juniper forward but I won't reveal the recipe here as I might want to make it again.
 
We had three gin and tonics while we were making it so luckily we had a very kind driver who took us to the chunky chip shop after as we were starving.


Seashells

I have started another throw. My lovely friend Mary loved being by the sea as much as I do. We lost her this summer and our best friend is finding it very hard. I am making this in the hope that it will bring her some comfort. I try to do it on light sunny days or at least by the fire so I can stich some warmth into it. There are 15 colours, 99 stripes and 4 rows of border so it will take a while yet! 


Sunday, November 3, 2019

The Results

 
Here are the results of my ice dyeing. I have learnt lots about doing it and can't wait to do more next summer.


Saturday, October 12, 2019

Silverclay workshop

I have wanted to had a go at this for absolutly ages. I expected to come home with a simple piece of jewellery but I learnt so much in my day with Lori Turner of LR Silver Jewellery.
 
We covered a tile in badger balm first and did our roller and our hands too. This is to stop the clay sticking. We then rolled the clay into a ball until all the cracks were gone. You need to put some pressure on it. Roll out the clay, turing it each time with the higher spacers. You can then put the texture under the clay and over it if you want texture on both sides. I used offcuts of wallpaper. Use the lower spacers then and just one firm roll from bottom to top. The clay is then ready to cut to your design.
 
I cut out my back and placed it over a little circular form to get the curved shape. I then cut out the front and placed that too on the form, trying to have them both on the same position. I also made a little bird using a mould. For this I pressed a small ball of clay into the mould and scraped away the excess from the middle outwards using a fine piece of metal. These were then left to dry for about twenty minutes. We used a hostess trolley for keeping food warm. You can use a hairdryer or leave overnight.
 
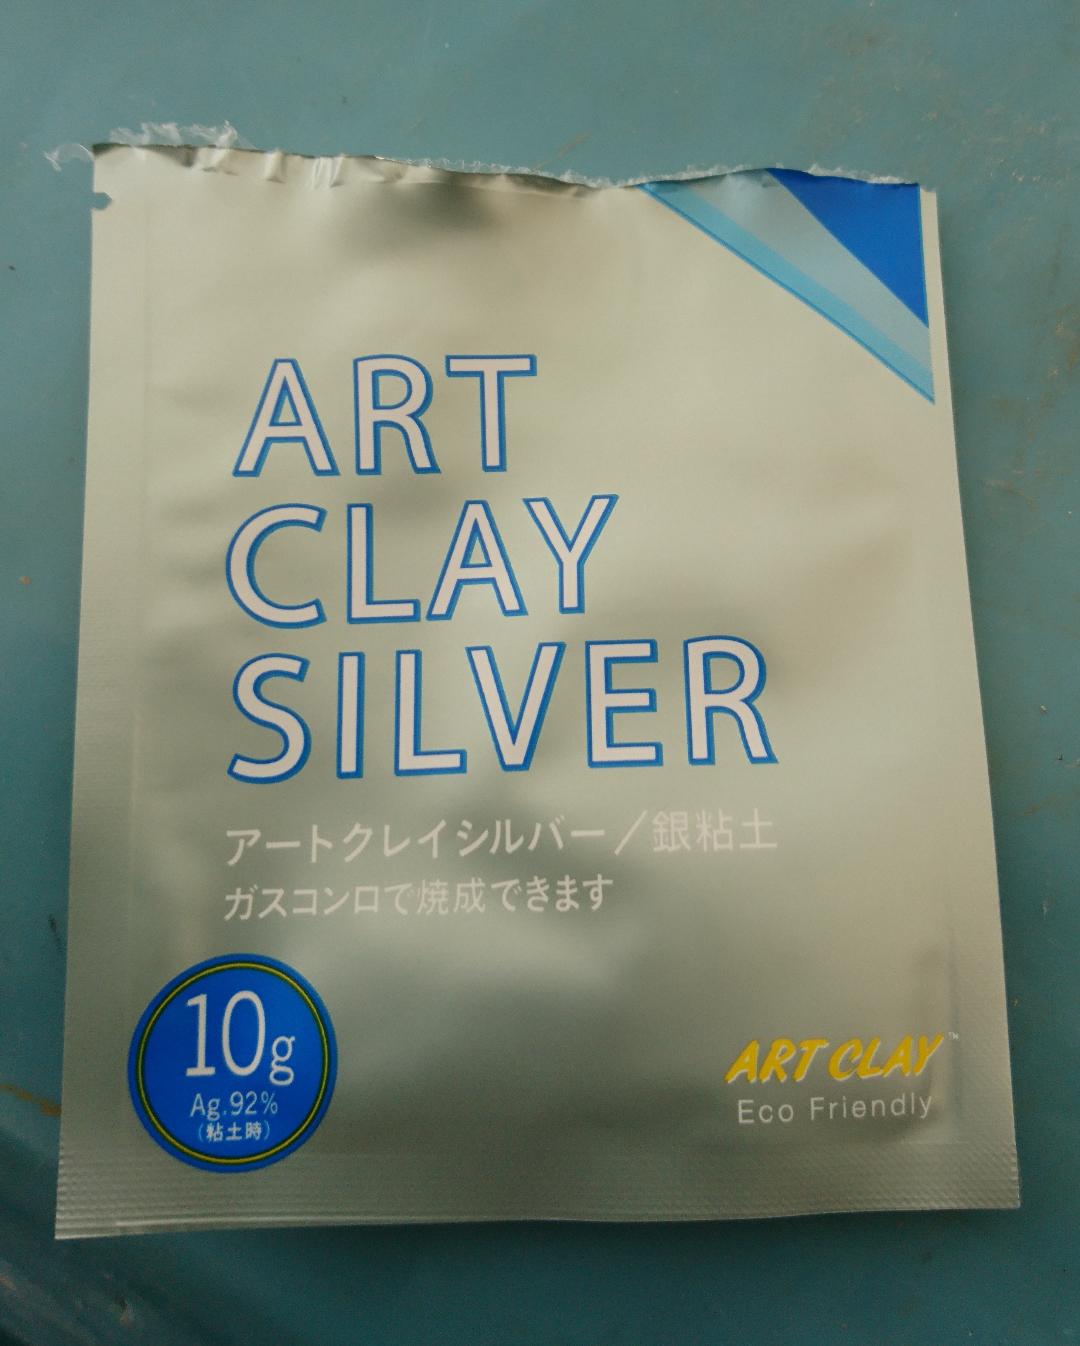
The clay is then very fragile. We used files and a sandpaper sponge to get off the rough edges. The pieces were placed back on the heat as they absorb moisture from the air. The unused clay was wrapped in cling film each time and covered with a baby wipe. If the clay gets too dry you will see cracking whn you roll it. You can bring it back by rolling it in clingfilm and adding a mist of water and roll again. The clay is expensive but can be kept wrapped up for a month or so in between uses.
 
It was now time to stick the piece together using a liquid slip. This comes in a small container and you have to add water and put in a syringe. The tip of the syringe needs to rest in water at all times. You then put water on one piece and slip on the other and stick the two together.  It is easiest to put water on the flat object for example the inside of the pendant where the bird went and then apply the slip to the bird. Hold the two together and give a few gentle twists until the join sets. If you break a piece it can be repaired using this slip and water. Back on the hostess trolly for another 20 minutes to dry. If you need a hole for earring fittings etc now is the time to do it with a drill bit.
 
It was then time to fire our pieces and they were done in a professional kiln and took 15 minutes once the kiln had reached 750 degrees. Lori also showed us how to dry our small charms using a blow torch. You heat the piece until it is a salmon pink colour. Best to do it in a dark room. Then set a timer. An earing would take about 3 minutes and our complicated pendants would have taken about 7 minutes. It is then time to polish off the white binder using a wire brush.
 
This is something that I will have another go at because I was thrilled with the end result. The bail is a bit wonky because you needed a flat bit to attach it to the pendant and this is difficult with  circle. This was handmade so who cares!!


Workshop

I had a go at doing an image transfer. Suzette Smart showed me how to use bondaweb. We ironed on the bondaweb, after covering it with baking paper to protect the iron, to a piece of callico with the rough (sticky) side down and left it a few minues. The image was then placed upside down on the callico. It is very easy to add other fibres from clothes etc at this stage so be careful, perhaps just use bondaweb where the image will be. Leave for about 20 minutes.
 
Take a sponge and some water and wash off the backing paper. Again be careful not to get the white backing paper on the bondaweb. The image will have faded so use a small amount of beeswax polish to bring it back. Leave to dry and you can then stitch into it.
 
I don't think I will be using this in my applique work but I can alread see a new project forming. I want to create a long picture of my Dad's life using old photos of him with a pathway of maps from where the photos were taken. This might just need to ferment for now while I finish off some of my other wip's.
 
It was a joy spending the day with another textile artist, learning new things, seeing her work and just talking threads.


Tuesday, September 24, 2019

Away from it all

I had a wonderful weekend with the guild in Kerry. We had three days of spinning, weaving and knitting beside Rossbeigh Strand. There was lots of eating, drinking and chatting with chocolate and cake to keep us going. It was lovely to get to know everyone a bit more and I enjoyed getting the loom out again. Spindle spinning next.  


Bo

I came across this Katia kit in Spain. It looked too daft not to want to take it home and play. It was in the sale too so that was an added bonus. The knitting was very boring. I forced myself to do ten rows of rib at a time and then I could do a more interesting project. I then just had to sew on his head, paws and tail and he was done. I do hope Lyla likes him. I think it is very likely he will just be dragged along the floor rather than worn.
 
Poor Bo!


Sunday, September 15, 2019

All Along

We took four years to travel all along the Wild  Atlantic Way and stop off at nearly every beach. On our travels I found a map book that an artist had created. It has the whole coast of Ireland on it. I decided to do some stitchings that I can sew into alternate pages. It will give me and opportunity to practice my embroidery stitches to create flowers and grasses in the foregrounds. For the background I used DMC linen and fabrics from my stash. To create distance I used some of the lucious silk from Karina for mountains.
 
This may take a while to finish as I have lots of other projects to work on first.   


TreeTime

It is time to start thinking of the festive word again. I decided to experiment and create some trees. I cut the ribbon and pinned it down. I then trimmed the edges into a tree shape. The ribbon was sewn down starting in the middle of each piece after I removed the pin. I then used three strands of embroidery silk to create the trunk and repeated that on either side. Finally it was a few sequins down the middle and some stars in metalic thread.
 
All set for the festive season.
 

Tuesday, September 3, 2019

Lucious

We decided to all treat ourselves to a piece of silk for our stash. I came across the work of Karina who dyes silk in Limerick. She dyed it to our colour specifications. There were lots of requests for sea and landscape colours and even one for hydreangea colours. The mix of colours are beautiful.  I choose one piece of the number 1 gauze finer silk and one of the  heavier number 2.
 
I am really looking forward to seeing how everyone uses their silk.

Monday, August 26, 2019

Three for a Girl


Lyla loves the stitching I did for her room before she was born.


Great Aunt Florence does it again

Great Aunt Florence has come up trumps again. I needed just one blue button from her button tin and when I searched through the blue ones I found a whole set as well. These have now been moved to my treasures jar. I love the idea of buttons that she cut from clothes that no longer had any wear left in them will now go on garments for future generations.


Sunday, August 11, 2019

"Longest Day"

I wanted to try doing a long landscape piece. I was going to put a farmhouse and sheep on it but it seemed to cry out for something bigger. The foxgloves this year have been awesome and they were my starting point. I rolled the fabric around my fingers to get the shape. I had completed most of the flowers when I realised the fabric I had used was not the right colour.
 
The hunt was on then for some new colour fabric and after about six visits to charity shops in Herefordshire I found the perfect blouse. The challenge was to get the dark pink in exactly the right place when I rolled it. I left the leaves fairly loose and added tiny seed beads to the inside of the flowers.
 
It is framed in my living room now and will live with me for a while.  


The results!

Here are the results of our day in Lismore. The twisting with the elastic bands was the best result with the baby gros. I am really pleased with the colours of the embroidery silks when I remember how boring the original colours were and I have already used the greens on a 2nd washing line. I have found a use too for the lace in a mixed media piece that I have started.
 
I can't wait to have another go!
 

Monday, July 22, 2019

Dyeing Day


I had a wonderful day in Lismore with my fibre friends from the guild. We took cotton garments to dye using ice. We first washed the garments at home. When we got to Lora's we soaked them in soda ash for 15 minutes. 1 cup of soda ash to one gallon of water. This solution can be covered and used one or two days after but no longer as it turns to ash. I took two baby gros, some lace and some embroidery silks that I wanted to try. I just scrunched up one of the baby gros and the other I twisted very tightly and then bound with elastic bands. This one had a much more interesting colour finish even though they were next to each other. I have since done more dyeing and the best twist is from one shoulder of the garment. This gives dyes in slanted bands.
 
Using rubber gloves and a face mask we placed them in a container over a drip tray. Lora had catering dishes I have used a dish drainer over a bowl. We covered all the fabric with ice and then shook dye over it. Lora had placed a level teaspoon of dye in a small plastic bag and we cut off one of the corners as his gives better control of the Procien dye powder. I used Intense blue, Veridian and Emerald green over my garments. When I used the dish drainer at home one bag of ice was enough.
 
Then it was just a matter of waiting until the ice melted and our treasures were revealed. I loved the colours of all the glistening ice cubes. I left it overnight then washed it with warm water and soft soap and rinsed until the water ran clear.  I am particularly pleased with how the embroidery silks turned out and I will try that with other colours in my stash that I don't like. I must be more careful of how I place them next time as they did get a bit tangled.

A fine day for drying

I fell in love with some of the fabrics in Lyla's baby dresses and wondered how I could use them. I decided to do a stitching of clothes on a washing line and use the dress fabrics for the clothes. The trousers are made from the dress Lyla is wearing in this photo. I had to inclue a butterfly as that is important to all the girls in our family as we know when we see one that Mum is close. This stitching is winging its way to Kirsty and I will now do one for Tina.


Sunday, July 7, 2019

Never Again cardi

I bought the yarn for this cardi in Spain. It is a 50/50 cotton and acrylic mix and I loved the colours.  It was an absolute pain to knit so I swore I would destroy the pattern when it was finished. I am pleased with the final result and really like the rib which is called beaded rib. The 1st row is all knit and the 2nd row is purl 1, knit 1 on an odd number of stitches.
 
The cardi was knitted all in one to the armholes. You then put that aside and knitted the sleeves on 4 needles to the armholes. The sleeves were then joined into the body and this involved manipulating lots of needles. The raglan sleeves were pretty straightforward but I kept forgetting to cast off.
 
This process reminded me of the 1st time I had knitted the top down gilet and now that is one of my favourites. Time will tell.

Friday, May 31, 2019

Embellish

I did a one-to-one day with a wonderful textile artist when I was on holiday. It was a joy being in her colourful studio talking threads and lots of other subjects.
 
I started by choosing a background for my piece. I  had decided that I would challenge myself and use different colours to my normal ones. The trouble was Stevie Walker likes the same colours as me so I settled on blues. Stevie dyes old blankets for the background material. I then choose some silks, scrim and merino locks and started to play. I started at the top of my piece and worked down. It didn't take long to get used to the embellisher and I really liked the effect you could get using silk.
 
After lunch in her lovely garden I started some free machine stitching. The trick is to have the foot working fast and the hands slow. I must remember next time to turn my work when I want to go over a line as it is easier that way. Stevie gave me lots of diagrams to take away so now I must face my fear of the machine and practice, practice, practice. To get the lines right(ish) for the cow parsley I first drew it on plain paper then traced it. I pinned the tracing paper to the background and used that as a template to stitch through. It is best just to do the main lines then take off the paper and do the more detailed work freehand. I did not do that so mine is wobbly in places as I couldn't see it through the paper.
 
There was no time for hand stitching so I finished that at home and added some tiny beads and some white neeps to the grasses at the bottom.
 
Here are some images of the finished work, the machine I used and some of the colourful locks. There is also and image of a sample machine stitched piece of Stevie's. She wanted to try doing a 3d effect.
 
I am inspired to do more.


Red and Blue favourites


I made cardis using two of my favourite knitting patterns for my great neice. She doesn't fit into them just yet but she looks SO cute. I must do smaller sizes next time!

WAW edging

I have now finished my Wild Atlantic Way crochet throw. I wanted to have a wavey edging so I choose the double v edge. It is really simple. You do 2 trebles then two chains and two more trebles into each space.


Tuesday, April 23, 2019

Fragments

"All I want is to be by the sea, and a cottage to just be"
 
We had a wonderful week in Connemara and it was lovley to be able to slow, slow, slow stitch surrounded by the sea. I was preparing backgrounds for our summer exhibition and I have now finished my seascraps trio. They will be framed individually and hung one below the other starting with the darkest at the top.